🔎【Surveillance Station】All-in-One security system inside each Synology NAS
13 min read
Any Synology NAS comes with a Surveillance Station package can upgrade NAS to:
- Professional network video recorder ( NVR ) Compatible for almost mainstream IP cameras to do long recording under home and business usage.
- Advanced VMS ( video management system ) For realtime monitor, quickly search video, get alarm on-time on mobile or computer, locally or remotely.
Synology Surveillance Station was developed since 2008. The latest version is 9.2.
Until now, it is almost impossible to find a security system with the same functions under the same price.
Therefore it is also the most popular Synology package.
Every year Synology will update its operation video and here is the latest one.
It is useful to quickly know how this security system can do.
Below is a quick starting guide with some tips of my Synology Support experience with continuous update.
- Synology Surveillance Station – What is it?
- Synology Surveillance Station – Why is using Synology NAS as an NVR a good idea?
- Synology Surveillance Station – 5 mins to install this standalone NVR package.
- Synology Surveillance Station – Choose IP Cameras
- Surveillance Station – Set Up IP Cameras
- Synology Surveillance Station – How to monitor Surveillance Station remotely or locally
- Synology Surveillance Station-Camera License
- Synology Surveillance Station–Combine all NAS NVR together-CMS
- Conclusion.
Synology Surveillance Station – What is it? #
Synology Surveillance Station is a free software in Synology NAS Package Center. It can turn any Synology NAS into a private network security surveillance system-also called NVR-with the ability to store a large number of IP camera videos, live monitoring, anomaly notifications, and video search.
Synology Surveillance Station – Why is using Synology NAS as an NVR a good idea? #
If we just google for NVR or home, DIY, business security cam system on the Internet,
we may find Synology Surveillance Station is one of the top recommendations.
Obviously a NAS can store camera videos for very long period.
However, there are also main 3 special points from Synology Surveillance Station:
- This package is with one-time cost license, without subscription fee.
- Compatible with almost all standard IP cameras
- Any Synology NAS can install it. Low hardware requirement
Notice about Synology License Plan
Synology uses license plan to activate devices in Surveillance Station.
By default, one Synology NAS has 2 default licenses for FREE USE.
Extra licenses can be purchased for additional IP cams more than 2. This is NOT FREE.
Interestingly, the total cost might be the lowest one compared to NVR cloud subscription fee. This is described below in License part.
Synology Surveillance Station – 5 mins to install this standalone NVR package. #
Surveillance Station first version was released since 2008. The main version 9 is the current latest version.
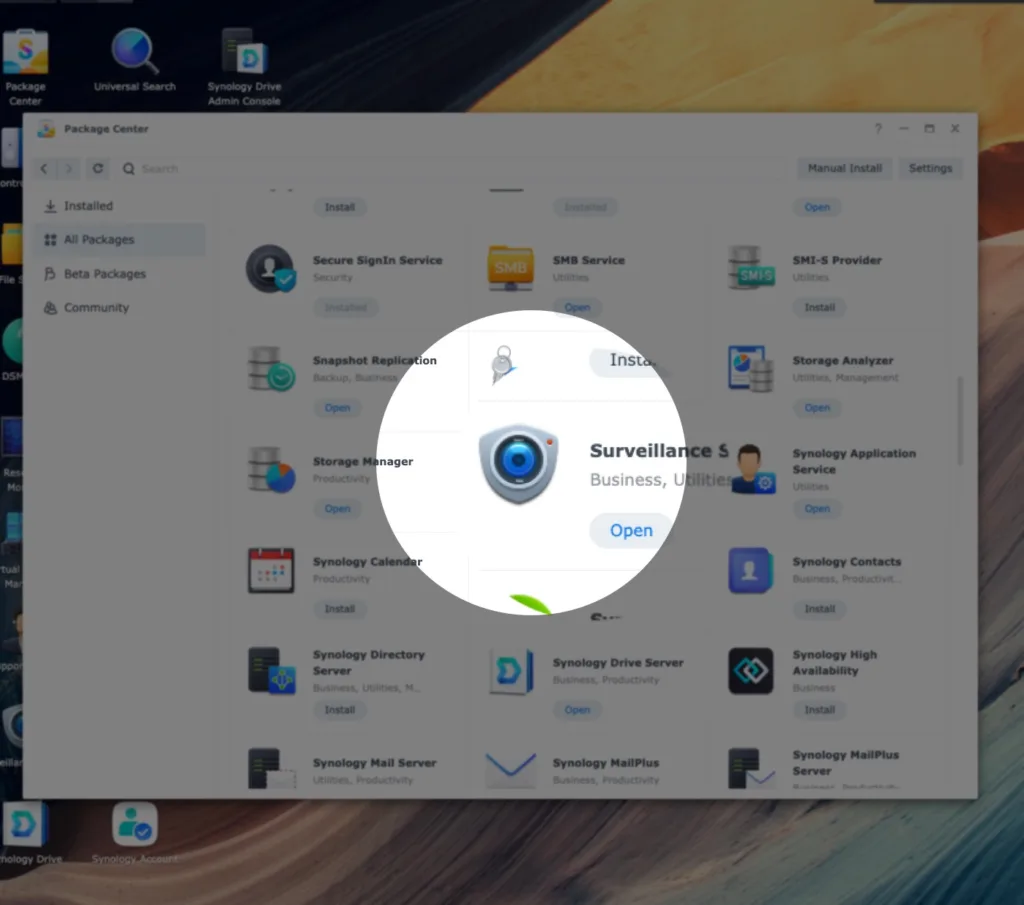
To install it, just log in to the Synology NAS operating system , also called DSM, on a browser > Package Center > search Surveillance Center, and it will be done in about 5 minutes.
Surveillance Station 9 needs Synology DSM OS version is at least DSM6.2. Most NAS released after 2013 support this version. The latest DSM is 7.2 while writing this post.
Click on Surveillance Station icon to enter its NVR operating system. The first login will prompt us to view the applications on its desktop:
If the Synology NAS is on a closed network, we can download Surveillance Station package from the Synology Download Center and install it manually.
If we have not a Synology NAS yet, we can also visit Surveillance Station Online Demo and try out the latest version.
Synology Surveillance Station – Choose IP Cameras #
To choose a compatible IP camera, we can get started after understanding the following 2 points:
1. How many IP cameras does my Synology NAS support at most? #
A single Synology supports at least 5, up to 650 IP cameras. Here is a way to find how many IP cameras one Synology NAS supports:
- Go to Synology website > Download Center > Documents > Product Specifications or Data Sheet
Take my old DS1517+ for example. Its limitation in Data Sheet is 40 :
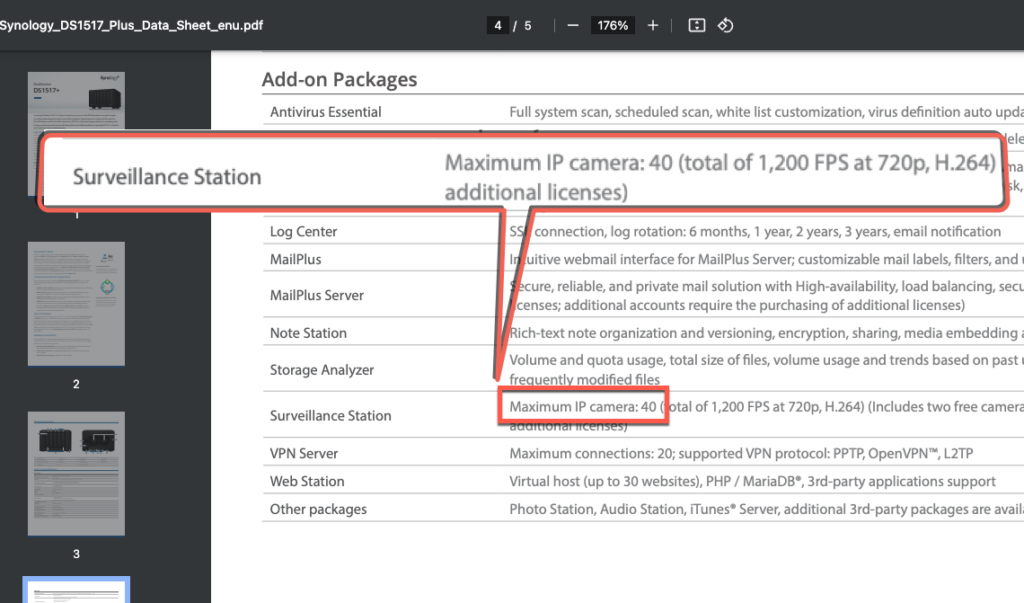
Since the Surveillance Station 9.1.3-10869 version, the camera amount limitation is removed.
Version: 9.1.3-10869 #
(2023-10-25)
Important Note #
- Removed the limitation on the number of IP cams. Check the suggested maximum number of IP cams in your product specification first for better performance.
Before this version, Surveillance Station can not configure IP cameras over the limitation.
The app【License】will also address the limitation:
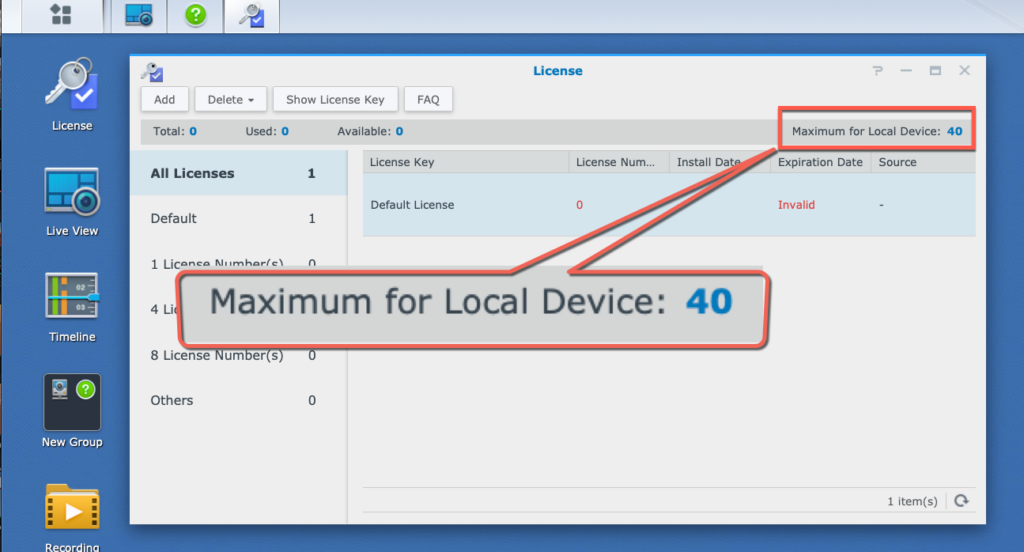
Since 9.1.3-10869 version, the camera number limitation is removed. We can set the camera resolution or frame rate according to actual needs.
You can check the recommended camera limits for each NAS model on Synology’s product comparison page (for current models) or in the product specifications.
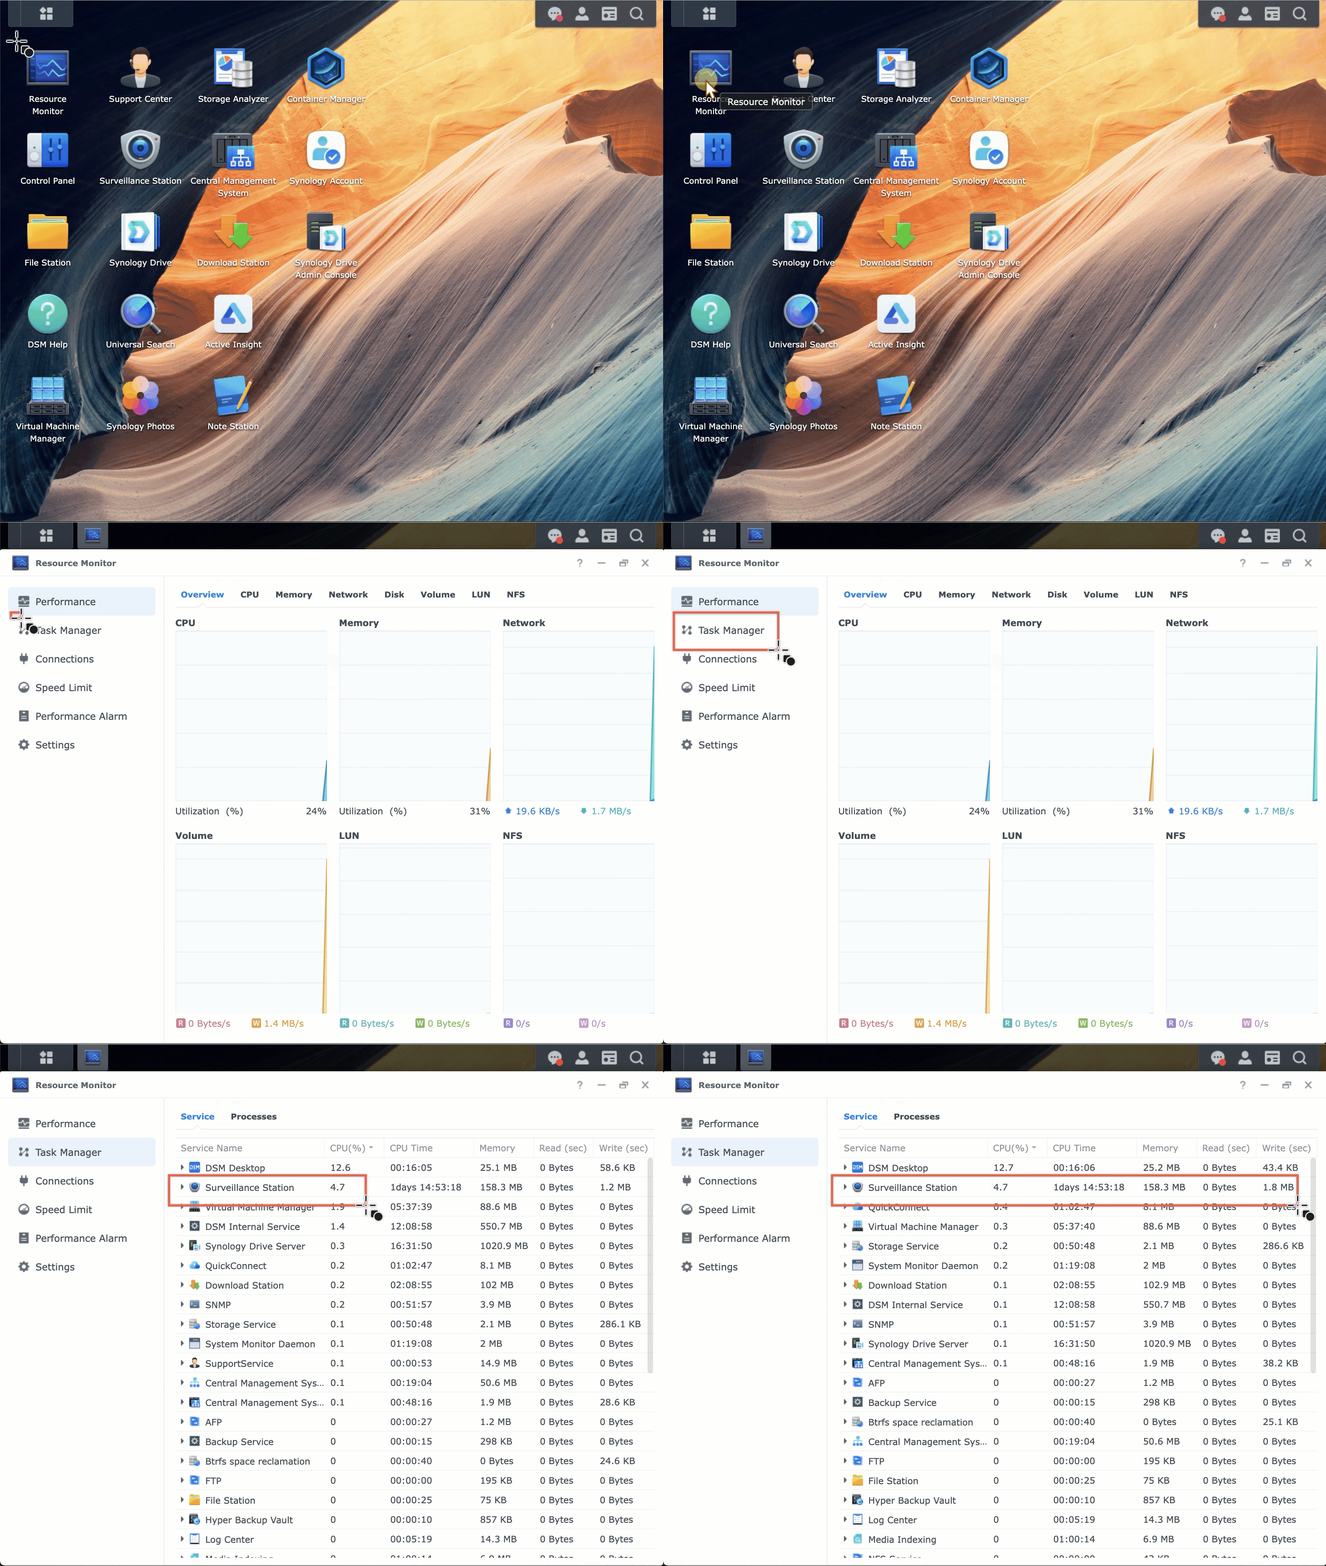
It is all fine if NAS performance is not affected. To ensure this, you need a performance indicator → Resource Monitor
Resource Monitor in DSM could help observe if Surveillance Station consumes too much resource.
Im most cases, Surveillance Station should only need few computing power.
2. What IP Camera is compatible or incompatible? #
■ Supported Cameras: #
For the first reference, we could search IP camera Support List. Basically the list has 3 types:
- The 3rd-party IP cameras: It includes over 8,400 cameras from around 150 different brands. Even more cameras are not on the official list but supported. Most standard IP cameras work if they support ONVIF or RTSP streaming.
- Synology cameras, BC500, TC5500: These are Synology own PoE cameras, released in mid-2023. They cost about 200-250USD more than cameras with similar hardware. Those models have built-in licenses and special software ability like AI detection.
- Synology LiveCam: This is an iOS/Android app could turns our mobile into an IP camera. Then mobile could work with Surveillance Station. It is useful for temporary monitoring or testing needs.
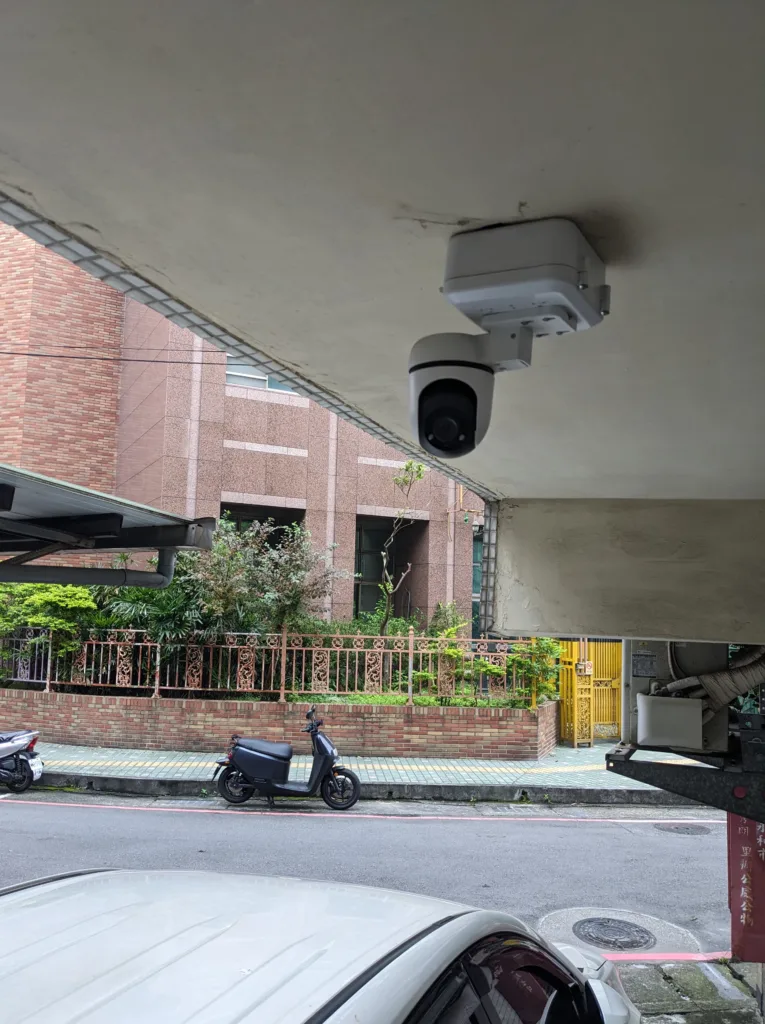
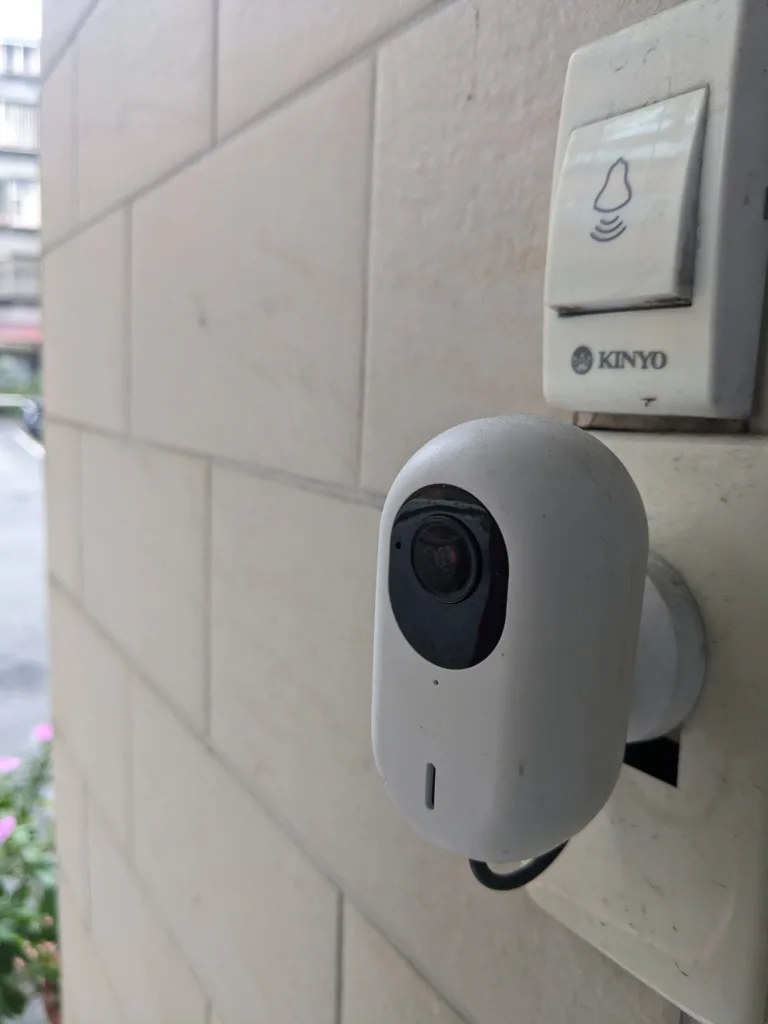
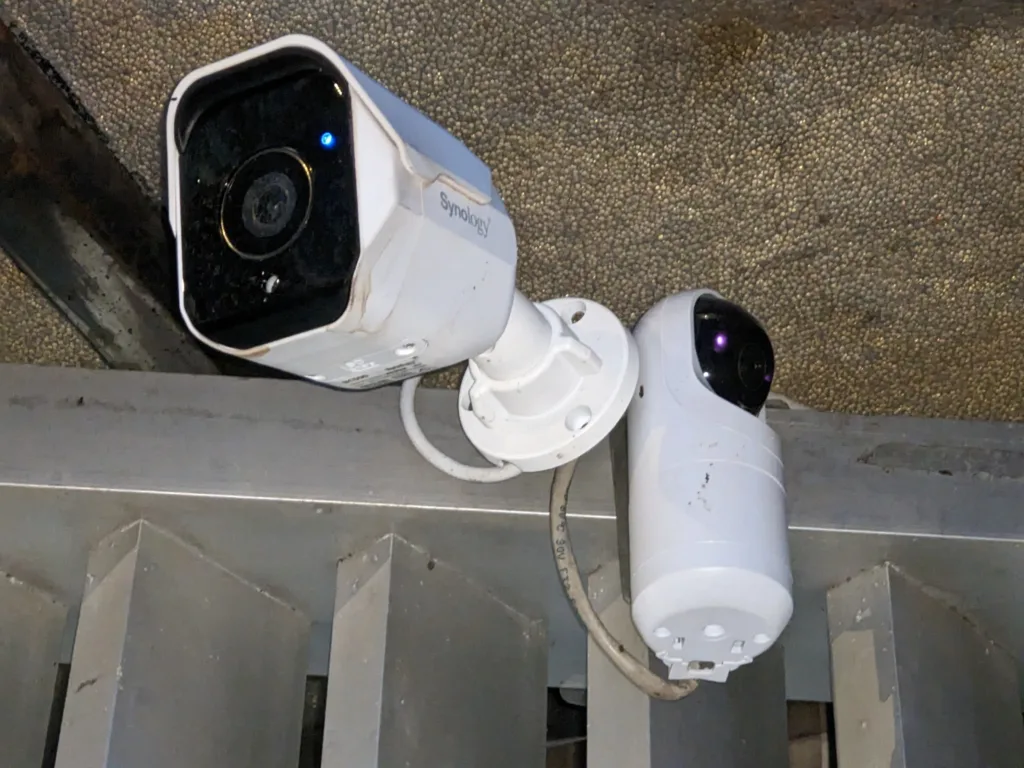
■ Unsupported Cameras: #
- Brand-locked security system: This kind of IP cameras may close ONVIF or RTSP( Xiaomi, Ring, Ubiquiti, Arlo, Google Nest…etc ). May need to tweak for get streaming path. This is often inconvenient.
- Battery-powered cameras: These cameras usually disable ONVIF or RTSP streaming for power saving.
In short, we could use a wide range of 3rd-party cameras. It is best to search the Synology IP camera support list as a guide, and remember that cameras supporting ONVIF or RTSP have a good chance of working, even if they are not officially listed.
About RTSP streaming url of my Ubiquiti IP cameras
I started using Ubnt cameras since 2018. My friends worked in Ubnt Taiwan ( Most Ubnt RDs are in Taiwan. Their office near Taipei101 ) sent me some samples. At that time, Ubnt cameras attracted me a lot because their resolutions, image quality and the beautiful hardwares. To make Ubnt IP camera work with Surveillance Station, it is a MUST to get its RTSP url. Its standalone mode has this information. I could easily add Ubnt cam to Surveillance Station.
Before 2022 or 2021, Ubnt seems stop support standalone mode. Then it is complicated to get a correct url to add to other NVR like Synology Surveillance Station. Thus we will see some posts on Reddit discussing how to get rtsp url by some way:
https://www.reddit.com/r/Ubiquiti/comments/uu3ov6/how_to_locally_stream_rtsp_on_vlc_guide/
Surveillance Station – Set Up IP Cameras #
Here are general 4 steps about how to set up our IP camera with Surveillance Station:
1. Connect IP camera to the local network. The general steps will like: #
- Follow the camera instruction to connect it to the wired or wireless network
- Most cameras will get an random IP address. We can either set a static IP address for the camera app, or reserve its IP in our DHCP server (usually this is the router)
- Set the camera streaming username, password, and management port number according to its instructions. This information will be used later
- Other settings we might want to adjust: the highest image quality, updating to the latest firmware, and synchronize its time zone by NTP time synchronization.
Confiture a Ubnt IP Cam
■ Set RTSP login user/password to synopower/club.
■ Set DHCP IP to static IP
■ Sync time with NTP server
2. Add the camera to Surveillance Station: #
- Open the IP Camera application in Surveillance Station and click Add. It will start searching for cameras on our network.
- ONVIF cameras and Synology cameras BC500/TC500 should be detected quickly.
- If the camera is NOT displayed, we can manually add it using the IP address and port number we set earlier.
3. Configure the camera settings from Surveillance Station: #
Once the camera is connected, we can use the same IP Camera to adjust various settings:
- Streaming quality – Setup different streaming quality for different devices. For example, high resolution for recording and low resolution for mobile liveview.
- Recording storage duration – Plan our own recording details. How long for video duration and motion detection recording plan.
- Motion detection – Detect motion and trigger recording or notification. In no words we could use cam its own detection setting or use detection from Surveillance Station
- Live view resolution for different devices
IP Camera → Device
Video: streaming quality, resolution, bitrate….etc.
Security: add mask to sensitive zone.
Advanced: RTSP/RTP streaming setting. PTZ control enabled or not.
IP Camera → Recording
Use Recording to plan the space required for each IP cam. Schedule helps to do different types of recording, continuous, different detection types. To save space, Stream could do that by choosing streaming types. Recording part is the key to plan space.
The Synology camera has a lot of settings that we can use. We can start with the default settings, and then explore the other settings later. For example, we can try the human and vehicle detection.
4. Reserve storage for video recordings: #
Here are several ways to estimate the required storage for IP cam recording files:
■ NVR Selector tool #
For example, if I choose 3 cameras with H.264 codec, 30 FPS and 5MP resolution, and want to store recordings for one year, I will need about 169TB of space on Synology NAS.
■ WD Surveillance Storage Capacity Estimator Tool #
I still select 3 cameras, one year recording, 5MP resolution, 30FPS. But I choose two formats: H.264, H.265. We could see H.265 could save a lot of space.
■ Use IP Camera → Edit → Video #
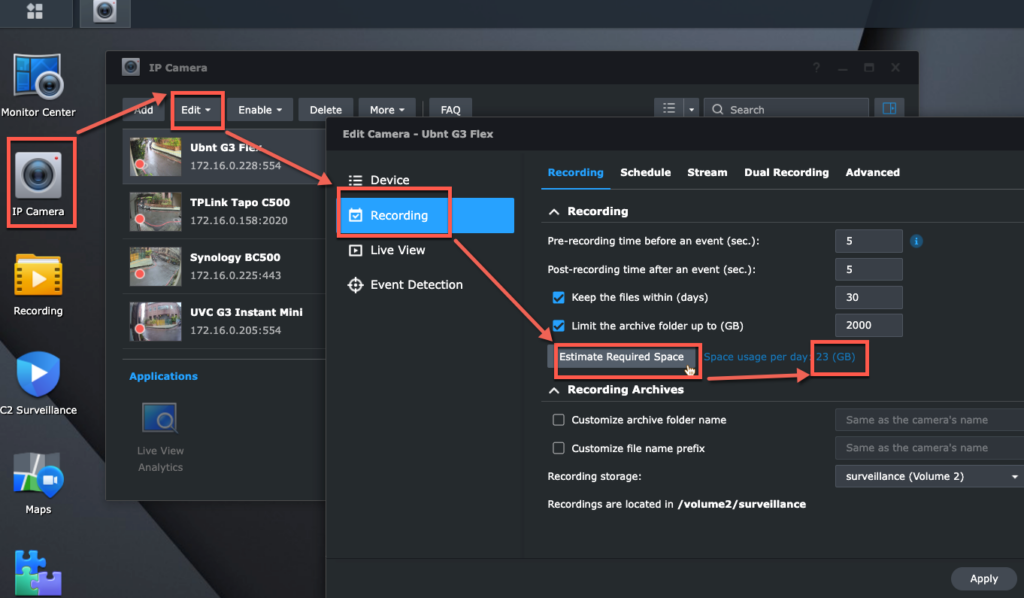
Please notice the estimation ways above give rough storage value. We need to observe 1-3 days to see if any adjustment required.
By following these steps, we should smoothly connect the IP camera to Surveillance Station and start using its various features.
Synology Surveillance Station – How to monitor Surveillance Station remotely or locally #
We can do monitoring by many ways. Synology offers mobile, computer, or physical clients as below:
- Surveillance Station Client for Mac or Windows.
- Google Chrome browser
- Use the DS cam app on iOS or Android mobile
Below is another two display ways not discussed here:
- Local Display: Another Synology Surveillance Station product line-a Deep Learning NVR DVA-has HDMI output.
- Connect an VS960HD, VS360HD, or VS600HD device to TV wall via HDMI to output Surveillance Station streaming.
The Monitor Center is a key feature in all of these clients. It lets us monitor live camera views, playback video history, search clips, or move IP lens ( if support PTZ move ) or its sound.
For monitoring IP cam streaming, Chrome and DS cam are my go-to apps. DS cam is mobile app available in iOS and Android. I also recommend this monitoring way. My Android is like this:
When we use Surveillance Station to watch multiple cameras view, we could see Synology NAS utilizes few CPU and memory only.
For example, when I use my Chrome browser to watch 4 camera feeds on my DS1517+, the CPU usage is about 5.3% and the memory usage is only about 150MB:
Most loading is on monitoring clients, like my computer. Thus if we need to monitor lots of IP cameras on Surveillance Station client of one computer, here is a FAQ about how to choose the computer suitable for the specs:
How do I choose a PC or VisualStation to monitor with Surveillance Station?
If I need to search for an object that is either missing or has just shown up, I switch to the Surveillance Station client on my Mac. This is because the smart search feature requires a significant amount of computing power, which is only available on desktop clients.
Here is also a good Synology FAQ to tell the difference of clients:
If Synology NAS is not in an isolated network, I will choose to set up QuickConnect for my Synology NAS. By this, I could access Surveillance Station via QuickConnect ID ( easier to remember) remotely or locally. QuickConnect automatically detects, then determines clients to access local IP or remote address via secure connection. That is convenient and safe.
Synology Surveillance Station-Camera License #
Any Synology NAS could easily manage over 5 cameras. (The high-end model could manage up to 650 cameras.) However, managing over 2 cameras or related surveillance devices requires licenses. Synology NAS comes with 2 default licenses ( Synology DVA series have 8 ) for free.
If the Surveillance Station needs to manage devices over 2, we can purchase extra licenses. Synology offers three license packs with a key. Input the key to License app then activate 1,4,8 devices. To add and active it, below is a how-to gif or you could check this FAQ:
💡Where to Buy and How to Add and Activate Synology Surveillance Station License
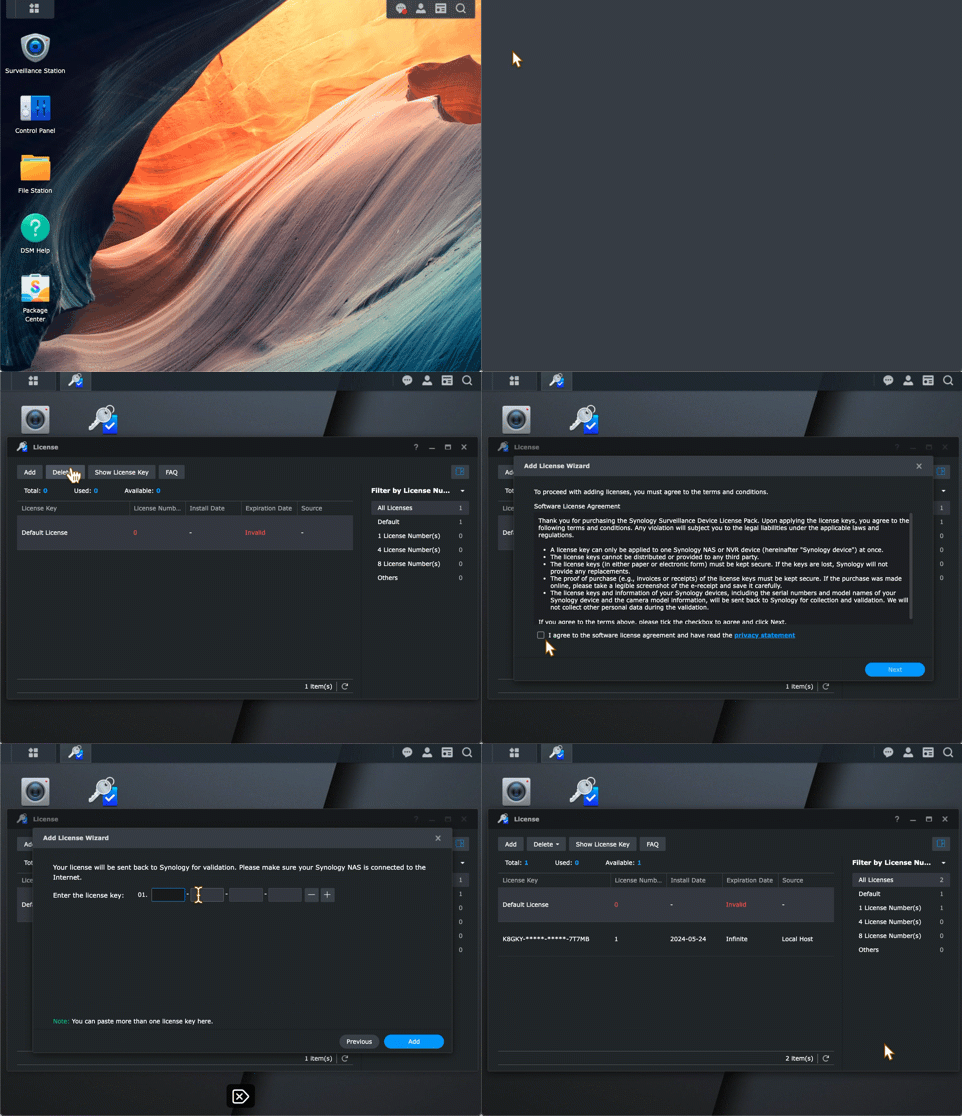
Each extra surveillance license price is about 50-60 USD.
It is one-time cost. Synology Camera License is lifetime valid. Therefore there is no need to pay subscription fee in the future.
Another good thing is this license supports migration. Suppose we buy one Synology camera license 10 years ago, we could migrate it to another new replaced Synology NAS or another Synology account, or sell to other Synology user needs license.
The only limitation is one license key could be only activated at one Synology server at the same time.
By this license policy, the license price seems high at the beginning. But it becomes cheap under a long usage.
For example 3 years, the monthly charge is equal to about 1.7USD monthly.
This fee is lower than IP-Cam subscription cloud fee. This 3-day-recording plan usually started since 3 USD per month for each camera.
This means 36USD annual fee per camera. And the recording plan is only one month recording.
Compared to the subscription fee, the cost of NAS Surveillance system is very low in long-term using.
This is why we choose selling this Synology license. The software quality, license policy and lifetime update are verified to be top already after developing for decades.
Ready to Get Synology Camera Licenses in Seconds? 👉 Pick here by 24×7 Online Delivery #
Synology Surveillance Station–Combine all NAS NVR together-CMS #
CMS ( Centralized Management System ) is one business tool of Surveillance Station. It could be directly activated in Surveillance Station > Application Center.
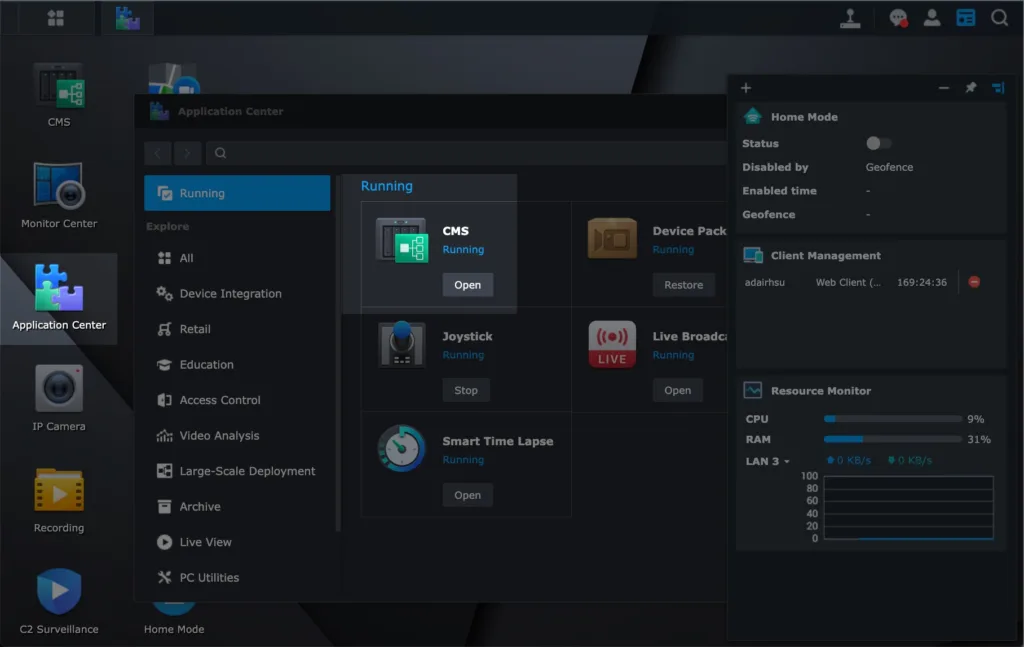
Its main purpose is to control multiple NASes and cameras together in one place.
The scale could be up to 1,000 NAS and 10,0000 cameras, depending on the NAS host server power.
Another tip is, CMS could save camera license fee too.
Remember, every Synology NAS owns two default free licenses.
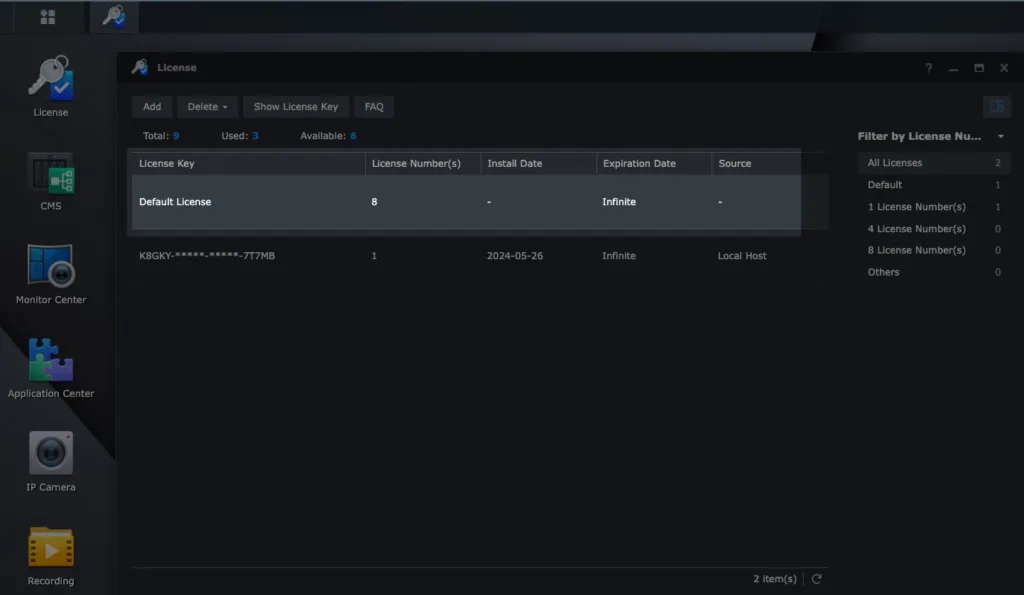
If we own two Synology or more, we could use CMS to merge default or purchased licenses together.
Here is an example. I have 4 Synology NAS. I use CMS in one NAS to be controller. Then it could merge the other three NAS together.
By this way I have 8 default free camera licenses to control 8 IP cameras:
Conclusion. #
Surveillance Station has been developed since 2008 and is now a very popular security cam system.
Even so, it is not a perfect system yet.
For example, to do a license plate or face recognition, this requires a Synology DVA products with GPU to run Surveillance Station.
Only those series of Synology products have a GPU that can do this kind of recognition.
A normal Synology NAS has no GPU module currently.
Besides, configuring a Synology NAS and IP cameras require network knowledge. In terms of plug-and-play, there is still room for improvement.
When deploying a large number of cameras at beginning, we will need to prepare extra cost for camera license.
However, Synology surveillance license is perpetual and migratable, the cost is the cheapest in the long run compared to subscription fee.
This is also why we choose to sell those licenses. According to most customers feedback to Surveillance Station, this mechanism is proven to be a win-win strategy.
If you are considering a security system, Surveillance Station is a must-try. Please also feel free to leave a message for further discussion.
SynoPower Club is a global online shop providing 24×7 instant delivery of official Synology licenses and consultant services. Operated by ex-Synology HQ Support

Office Locations
🇹🇼 Taiwan Office
Bitter821 LLC. ( TIN 90247314)
No. 57, Minquan Rd., Magong City, Penghu County 880008, Taiwan (R.O.C.)
〶 [email protected]
☎ (+886) 939-288-454
