🛠️ Repair Synology DiskStation Hard Drive Tray Door Latch
1 min read

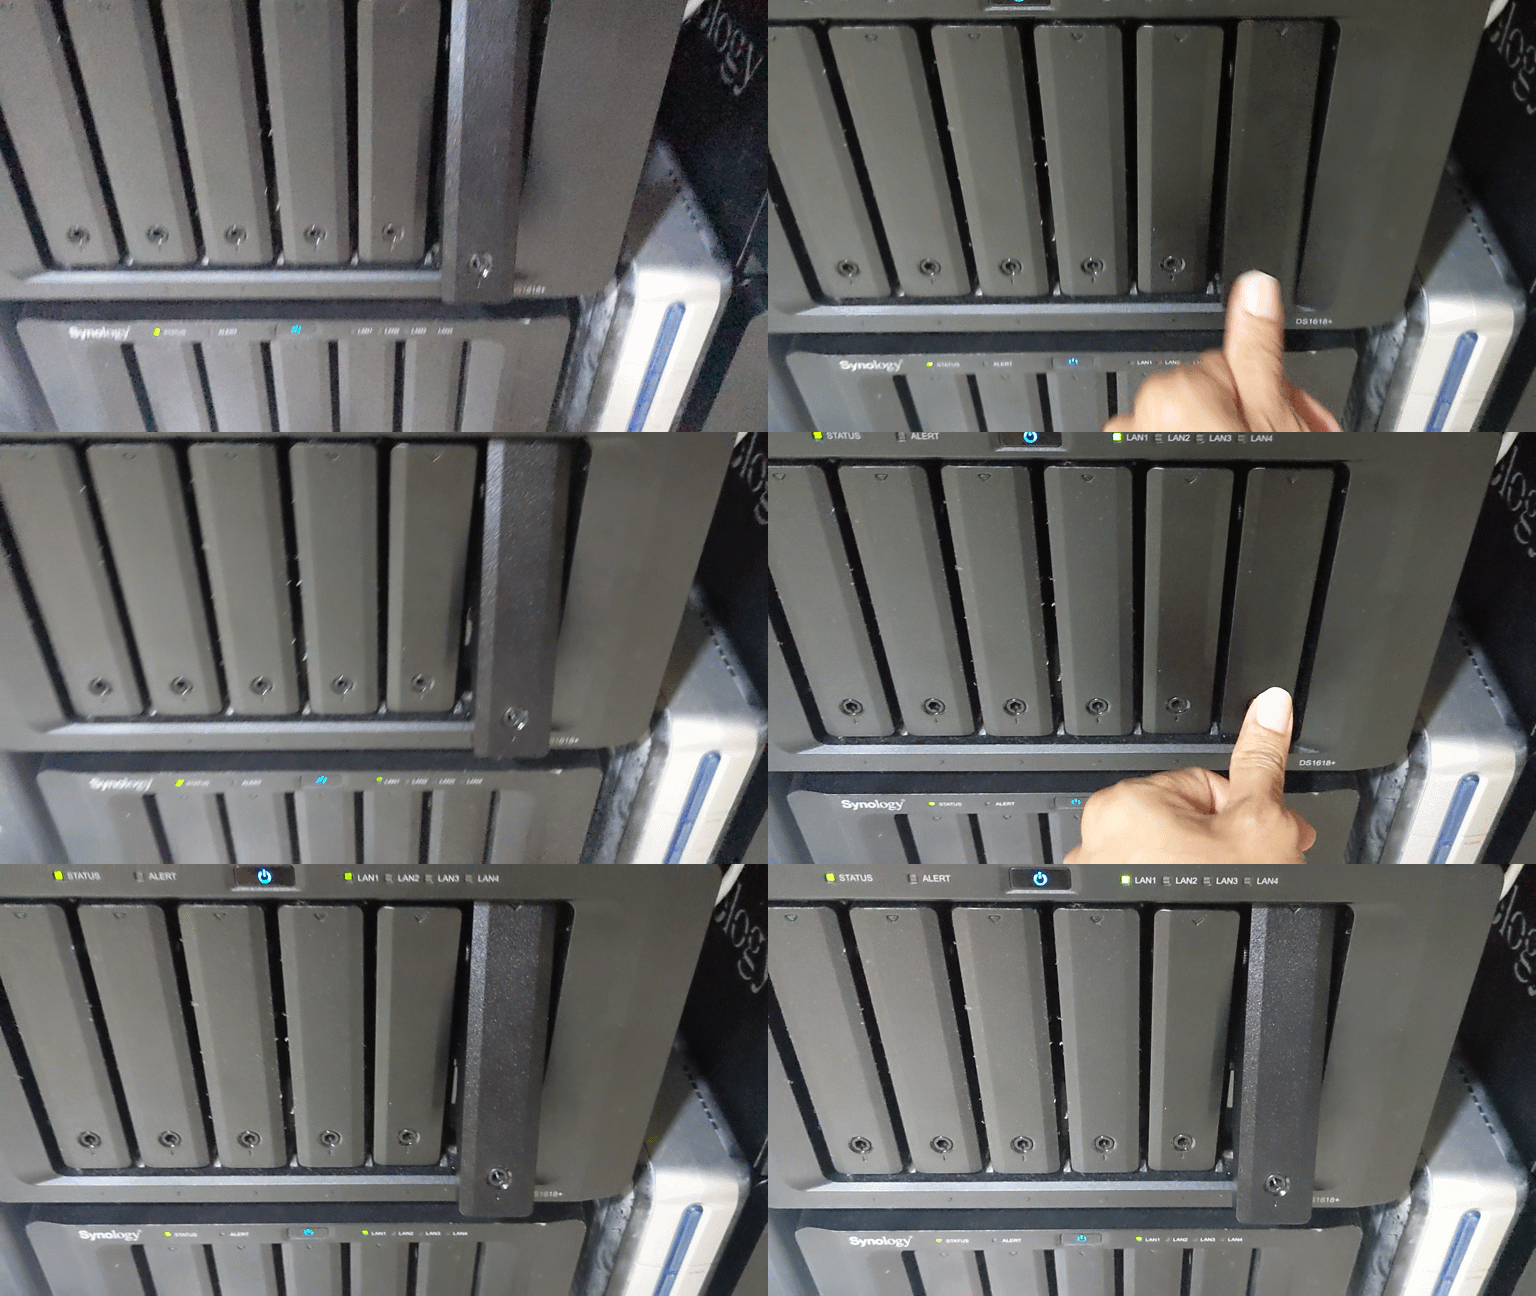
This document outlines the repair process for a Synology hard drive tray listed below latch that can not lock and keeps coming loose:
Disk Tray (Type D3) Applied Models: DS1511+, DS1010+, DS710+, DX510
Disk Tray (Type D5) Applied Models: DS1812+, DS1512+, DS713+, DS712+, DX513
Disk Tray (Type D6) Applied Models: DS3622xs+, DS3617xsII, DS3617xs, DS3615xs, DS3018xs, DS2422+, DS2419+II, DS2419+, DS2415+, DS2015xs, DS1823xs+, DS1821+, DS1819+, DS1817+, DS1817, DS1815+, DS1813+, DS1621xs+, DS1621+, DS1618+, DS1517+, DS1517, DS1515+, DS1515, DS1513+, DS718+, DS716+II, DS716+, DS715, DS215+, DS214+, DVA3221, DVA3219, DX1222, DX1215II, DX1215, DX517, DX513
Disk Tray (Type D8) Applied Models: DS918+, DS418, DS418play
Disk Tray (Type D9) Applied Models: DS1522+, DS1520+, DS1019+, DS923+, DS920+, DS723+, DS720+, DS423+, DS420+, DVA1622
Cause
The latch on the Synology hard drive tray may become worn over time, preventing it from locking securely.
Replacement Part
Replacement latch item can be found online by searching for those words:
bin lid latch clip catch touch trash can kitchen push
Search result:

Repair Procedure
- To remove the latch from the Synology drive tray, you need to press down on both sides of the latch.


2. Prepare a small flat-head screwdriver and use it with the nail of one of your fingers to easily remove the latch and install the new one
Here are two versions to replace the latch of Synology HDD Tray for reference:
👉 Take official Synology license in SynoPower Club to support us! #
2 Comments
Leave a ReplyCancel Reply
SynoPower Club is a global online shop providing 24×7 instant delivery of official Synology licenses and consultant services. Operated by ex-Synology HQ Support

Office Locations
🇹🇼 Taiwan Office
Bitter821 LLC. ( TIN 90247314)
No. 57, Minquan Rd., Magong City, Penghu County 880008, Taiwan (R.O.C.)
〶 [email protected]
☎ (+886) 939-288-454


Amazing tip.
It worked on my ds718+
Thansk a lot!!
Glad to be of some help! Your kind words make my day. Take care!
🙂